Installing folding solar panels on a camper van can transform your travel experience. Renowned expert in off-grid living, Sarah Thompson, emphasizes, “Harnessing solar energy enables freedom and flexibility on the road.” Her insight reflects the importance of renewable energy for modern campers.
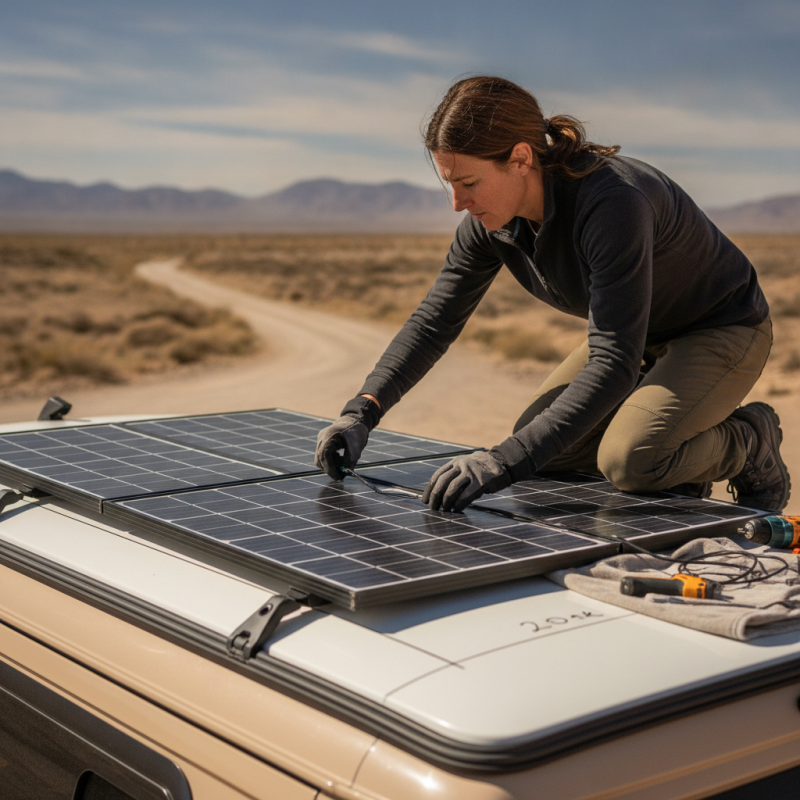
Understanding how to install folding solar panels on a camper van requires both knowledge and hands-on experience. Choosing the right location is crucial. Direct sunlight exposure extends the panels' efficiency. Ensure that the installation surface is clean and stable. Precise measurements allow for smoother mounting and wiring connections.
However, mistakes often occur. Many campers oversize their solar systems or underestimate power needs. Carefully assessing your energy consumption is essential. Embracing trial and error may lead to valuable lessons in optimizing your solar setup. With patience and practice, you'll master the art of solar installation on your camper van.
Choosing the right folding solar panels for your camper van can be a challenge. Consider your power needs first. Calculate the wattage of all devices you'll use during trips. Small panels might suffice for basic needs, but larger setups will power refrigerators or air conditioners.
Durability is essential. Folding solar panels should withstand various weather conditions. Look for models that are waterproof and have a robust build. This ensures longevity even on rugged adventures.
Weight is also a key factor. Lighter panels are easier to handle but may compromise efficiency. Don't overlook portability. Check how compact the panels are when folded. This affects storage space in your van.
Lastly, think about efficiency ratings. Higher efficiency means more power generation in less sunlight. It's a balancing act. Finding the right panel often requires some trial and error. Always double-check compatibility with your existing setup.
To successfully install folding solar panels on your camper van, having the right tools is critical. A reliable set of tools ensures a smooth installation process. Basic tools include a screwdriver, adjustable wrench, and a power drill. These are essential for securing the solar panels in place. A multimeter can help you check the voltage and ensure everything is functioning correctly.
Tips: Always double-check your tools before starting. It saves time to have everything ready. Using a level can help ensure your panels are aligned correctly. This can prevent future issues with panel performance.
Safety gear is crucial too. Wear gloves while handling tools and panels to protect your hands. A dust mask is also wise, especially when drilling. Remember to work in a well-ventilated area. Sometimes the ideal installation site is hard to find, and this requires flexibility.
Ultimately, practicing these setups can lead to easier future installations. Each project might reveal something new, whether it's a tool you didn't consider or a technique that works better. Take notes on what works and what doesn't; this can prove invaluable for your next solar project.
Installing folding solar panels on your camper van can seem daunting. Yet, with a clear step-by-step guide, the process becomes manageable. Start by gathering your tools. You will need a drill, screws, mounting brackets, and a sealant to prevent leaks. Preparation is key here. Ensure you clean the roof surface well. Dirt and grease can affect the panel’s adhesion.
Next, position the solar panels on the roof. Take a moment to visualize the layout. Consider the angle of sunlight and existing roof features. It's a trial and error process initially. Mark the drill points using a pencil. Drill the holes carefully to avoid damaging the roof. Remember to use a sealant around each bolt to prevent water ingress.
Attaching the panels requires patience. Secure them using the mounting brackets. Tighten bolts properly but don’t overdo it. Over-tightening can crack the panels. This is a common mistake for beginners. After installation, double-check all connections. It’s essential for the efficiency of the panels. Don't rush; ensure everything is aligned properly. Mistakes at this stage can lead to future issues.
Connecting solar panels to the electric system of a camper van can be straightforward but requires careful planning. A key consideration is the type of inverter you choose. An inverter converts the direct current (DC) produced by solar panels into alternating current (AC) for household appliances. According to industry reports, around 30% of camper van owners prefer inverters with pure sine wave technology for efficiency and compatibility.
Wiring is another essential aspect. Using the right gauge of wire can prevent energy loss. High-quality solar cables are usually rated for a specific voltage. For instance, most camper van systems operate at 12V, and a 10 AWG wire is appropriate for distances up to 30 feet. Remember that improper wiring can lead to overheating or voltage drops, issues that 25% of DIY installers face, compromising their systems.
Pay attention to the charge controller as well. It regulates the voltage and current coming from your solar panels. A maximum power point tracking (MPPT) controller can increase charging efficiency by up to 30%. However, it may require more initial investment. Reflecting on the costs versus benefits is crucial. Each installation has unique challenges and potential pitfalls, making it essential for installers to research continuously.
Maintaining your folding solar panel setup is crucial for long-term efficiency. Regular cleaning is essential. Dust, leaves, and bird droppings can block sunlight. A simple wipe with a damp cloth can do wonders. Just make sure to turn the panels off before cleaning. Avoid using harsh chemicals, as they can damage the surface.
Monitoring your setup is also important. Check the connectors periodically for corrosion or dirt. A loose connection can reduce efficiency. Keeping your cables organized helps prevent wear and tear. Consider using cable ties for neatness. Over time, batteries may need replacing due to diminished capacity. Regular checks can extend their lifespan.
Sometimes, you may encounter performance issues. If your panels don’t charge effectively, double-check their orientation. Solar panels work best when angled directly at the sun. Reflect on your setup’s placement and adjust if necessary. An ineffective location could limit your power generation. Don’t hesitate to change things around for optimal results.
: You need a screwdriver, adjustable wrench, power drill, and a multimeter to get started.
Always use a level to align the panels and double-check your mounting before securing them.
Wearing gloves and a dust mask protects you from injuries and inhaling dust, especially when drilling.
Use mounting brackets and ensure bolts are tightened correctly without over-tightening to prevent cracking.
Choose the right inverter and use appropriate wiring to prevent energy loss and overheating issues.
Use sealant around bolts to prevent leaks and ensure a waterproof installation.
Cleaning the roof ensures better adhesion of the solar panels and reduces future performance issues.
Rushing through the installation can lead to misalignment and inefficiency in the solar system.
Invest in a high-quality charge controller, like an MPPT, for better voltage management and performance.
Taking notes on missing tools or techniques can help improve future installations. Ensure everything is ready beforehand.
If you're wondering how to install folding solar panels on a camper van, this guide provides a comprehensive overview of the process. Start by choosing the right folding solar panels that suit your energy needs and the space available on your van's roof. Essential tools include a drill, mounting brackets, and wiring kits.
The installation process consists of several steps, from securely mounting the solar panels on the roof to connecting them to the van's electrical system. Finally, remember to maintain your setup regularly to ensure optimal performance. With these steps, you can enjoy the benefits of solar energy while traveling in your camper van.