Why Is My MPPT Solar Charge Controller Not Charging?

Time:2026-10-05 Author:Charlotte
0%

Why is my MPPT solar charge controller not charging? This question usually begins with a quiet battery, a blank display, or a solar array producing less power than expected. An MPPT controller does not create energy. It tracks available panel voltage and converts it into useful charging current. If the battery voltage, wiring, settings, or sunlight conditions are wrong, charging may stop.

Solar educator Will Prowse offers a practical reminder: “Test the system before replacing parts.” That principle matters here. A digital multimeter can reveal more than a warning light. Measure the panel voltage at the controller terminals, then check battery voltage under the same conditions. Inspect every fuse, crimp, breaker, and connector. One loose cable can look like a failed controller.

Real troubleshooting is rarely dramatic. A shaded panel may show 18 volts at noon but deliver almost no current. A lithium battery may reject charging because its BMS has disconnected the cells. A controller may also be configured for the wrong battery chemistry. These details are easy to overlook. I have seen owners blame the MPPT unit before checking a corroded ring terminal.

This guide examines why is my mppt solar charge controller not charging through measurable symptoms and practical tests. It also explains when resetting settings is sensible, when wiring requires correction, and when professional inspection is safer. Some diagnoses remain uncertain without load testing. That is worth admitting. Good solar advice depends on evidence, not guesses.
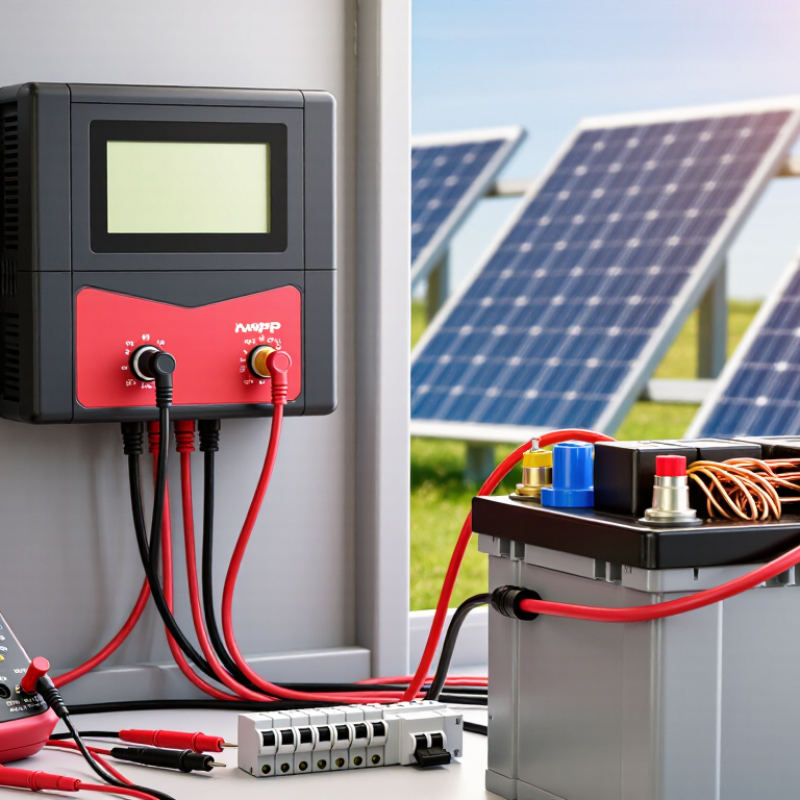
Why Is My MPPT Solar Charge Controller Not Charging?

Understanding How an MPPT Solar Charge Controller Works

Why Is My MPPT Solar Charge Controller Not Charging?

Understanding How an MPPT Solar Charge Controller Works

An MPPT controller continuously searches for the solar array’s highest power point. Solar voltage and current change with sunlight, panel temperature, and shading. The controller then converts that input into a suitable charging voltage for the battery. In simple terms, it trades extra panel voltage for useful charging current. This process is more active than basic voltage regulation.

A controller may stop charging when the battery reaches its absorption or float stage. That behavior is normal, not necessarily a fault. However, low battery voltage, incorrect battery settings, or a weak connection can also prevent charging. Measure the panel voltage at the controller terminals during bright sunlight. Then measure the battery voltage separately. A large difference between expected and measured values deserves attention.

Shading from a railing can reduce output sharply. Loose terminals, damaged cable insulation, and a reversed connection can create similar symptoms. I have learned that checking the display alone can be misleading. It may show solar voltage but almost no usable current. Review the charging profile, maximum input rating, and temperature sensor readings. Disconnecting equipment in the wrong order can also confuse diagnosis, so follow the controller’s instructions carefully. Sometimes the panel is fine, while the battery is simply full. That possibility is easy to overlook.

Checking Solar Panel Input and Battery Conditions

Why Is My MPPT Solar Charge Controller Not Charging?

When an MPPT solar charge controller shows no charging current, check the solar input before replacing anything. Measure voltage directly at the controller’s PV terminals during strong daylight. Do not rely only on the panel’s open-circuit reading. A shaded panel, loose connector, damaged cable, or blown fuse can produce voltage without useful current. The PV voltage must remain above the controller’s startup level and the battery’s present charging voltage. I once found a system reading normal voltage at the panel, but corrosion at one connector reduced current almost completely. Small losses matter.

Then inspect the battery conditions. Measure its voltage after removing charging loads for several minutes. A very low reading may indicate deep discharge, a tripped protection circuit, or a failing cell. A nearly full battery may also receive little current because the controller has entered its absorption or float stage. Battery chemistry changes the diagnosis. Some lithium batteries stop accepting charge in cold conditions, while lead-acid batteries may show surface voltage without holding energy. Check the battery terminals, fuse, polarity, and cable tightness. Work carefully around live connections.

Look at the controller’s status indicators and charging history. Record PV voltage, battery voltage, and charging current at different times. One reading can mislead. If PV voltage collapses when connected, suspect a panel or wiring fault. If PV voltage stays stable but battery voltage never rises, test the battery and charging path. My first diagnosis is not always right; comparing readings under sunlight usually reveals the overlooked detail.

Inspecting Wiring, Connections, Fuses, and Polarity

When an MPPT solar charge controller shows zero charging, inspect the wiring before blaming the electronics. A panel can produce voltage at the controller, yet deliver almost no current through a loose crimp or corroded terminal. Turn off the array and battery sources according to the equipment manual. Then examine cable insulation, terminal pressure, and connector fit. Look for heat marks. They matter.

Use a properly rated multimeter to check battery voltage at the controller terminals, not only at the battery posts. A noticeable difference suggests resistance in the cable, fuse holder, or disconnect switch. Check the solar input in sunlight while avoiding exposed conductors. Confirm that positive and negative wires reach the correct terminals. Polarity errors can prevent charging or damage sensitive components. I once trusted a cable color and missed a reversed extension lead; labels and meter readings would have exposed it earlier. Color is not proof.

Inspect every fuse for continuity and the correct rating. A blown fuse may indicate a short circuit, overload, or installation mistake. Do not replace it with a larger fuse. Check fuse holders for looseness, moisture, and darkened plastic. Tighten connections to the specified torque, because overtightening can also damage terminals. After restoring power, observe charging current for several minutes. If voltage is normal but current remains absent, record the readings before testing further; intermittent faults often disappear when cables move. Rushed troubleshooting can mislead.

Why Is My MPPT Solar Charge Controller Not Charging?

Compare these typical reference readings for a 12 V MPPT solar system. A large voltage difference between the solar panel and controller, or between the controller and battery, can indicate loose wiring, a blown fuse, excessive cable resistance, or reversed polarity.

Reviewing Controller Settings and Charging Indicators

Why Is My MPPT Solar Charge Controller Not Charging?

When an MPPT solar charge controller appears inactive, check its settings before replacing hardware. I once blamed a weak solar panel, but the battery had already reached its absorption limit. The controller was working quietly. Measure the battery voltage with a multimeter, then compare it with the display. A large difference may indicate loose terminals, damaged cables, or an incorrect voltage setting.

Review the battery type, system voltage, and charging stages. Absorption voltage set too low can stop charging early. A float setting that is too high can stress the battery. Confirm the temperature compensation option, especially when the controller has a remote sensor. The sensor should touch the battery case firmly. Small details matter.

Watch the charging indicators in changing sunlight. A flashing solar icon may show panel input, while a solid battery icon may only show connection. Current should rise when sunlight reaches the panels directly. Test around midday, not at dawn. If solar voltage is present but charging current remains near zero, inspect polarity, fuses, and terminal tightness. I have sometimes trusted a screen too quickly. That was a mistake. The display can lag, misread, or hide a configuration problem. Record voltage and current readings at different times, then compare them with the controller’s manual.

Testing for Faults, Overheating, and Hardware Failure

Why Is My MPPT Solar Charge Controller Not Charging?

A silent MPPT controller is not always defective. Begin with the battery, because a full battery may accept almost no current. Measure voltage directly at the battery terminals, then compare it with the controller display. A large difference suggests a loose cable, corroded lug, or damaged fuse. Check polarity carefully. A reversed connection can trigger protection or cause permanent damage.

Test the solar array at the controller input in full sunlight. Record open-circuit voltage, then measure voltage again while charging. The reading should remain above battery voltage with operating headroom. If voltage collapses, inspect shaded modules, cracked connectors, and loose wiring. The National Renewable Energy Laboratory’s PV Lifetime Project reports median module degradation near 0.5% annually. That slow decline does not explain a sudden charging failure. I would suspect wiring or protection settings first.

Heat creates a less obvious fault. Feel the enclosure carefully, without touching exposed conductors. A controller may reduce output when ventilation is poor, mounted against a hot surface, or exposed to direct afternoon sun. The International Energy Agency Photovoltaic Power Systems Programme identifies thermal stress as a major contributor to power-electronics aging. Clean dust from vents and check terminal tightness after isolating the system. Do not trust one test. A failed temperature sensor, damaged switching device, or unstable display may require controlled bench testing. Sometimes the controller is faulty. Sometimes the battery is refusing charge.

Why Is My MPPT Solar Charge Controller Not Charging? - Testing for Faults, Overheating, and Hardware Failure

Check Area Typical Symptom Test or Measurement Normal or Expected Result Likely Fault Recommended Action
Safety and isolation Sparks, blown fuses, hot wiring, or unexpected shutdowns Switch off the solar array and battery disconnects before tightening or rewiring. Use insulated tools and verify polarity. No exposed conductors, damaged insulation, loose terminals, or signs of arcing Short circuit, reverse polarity, loose connection, or incorrect isolation sequence Stop testing if cables are hot, swollen, melted, or damaged. Correct the wiring only after the system is safely isolated.
Battery connection Controller display is blank or shows no battery Measure DC voltage directly at the controller battery terminals, then compare it with the battery terminals. The two readings should be close; a significant difference indicates cable or connection loss. Blown battery fuse, disconnected cable, corroded terminal, or reverse polarity Inspect the fuse, lugs, cable size, and polarity. Replace a fuse only with the specified type and rating.
Battery voltage The controller is connected but charging current remains at zero Measure the battery after the charging source has been disconnected and the battery has rested. A 12 V lead-acid battery is commonly about 12.6–12.8 V when full at rest; around 12.2 V is approximately half charged. Values vary with temperature and load. Battery is already full, deeply discharged, damaged, or outside the controller’s supported voltage range Confirm battery chemistry and nominal voltage in the controller settings. Do not charge a damaged or swollen battery.
Solar array voltage Battery is detected, but the solar input shows zero volts In bright daylight, measure voltage at the array input terminals with the array safely connected as specified by the controller instructions. The measured voltage should be consistent with the panel string design and remain within the controller’s maximum PV input voltage. Open circuit, disconnected string, blown PV fuse, failed isolator, or incorrect wiring Trace the circuit from the panels to the controller. Check connectors, isolators, fuses, and cable continuity.
PV voltage versus battery voltage PV voltage is present, but charging does not begin Compare live PV voltage with the battery voltage while the panels are illuminated. The PV operating voltage must be higher than the battery voltage by the controller’s required operating margin. The exact margin is model-specific. Insufficient PV voltage, excessive voltage drop, partial shading, or a string configuration that is too low Check the controller specifications, cable voltage drop, panel configuration, and shading conditions.
Solar current PV voltage is normal, but charging current is very low Measure PV current or read the controller’s live PV current during strong sunlight. Compare it with the expected output for the weather and array size. Current should rise with irradiance, although clouds, heat, panel angle, dirt, and shading can reduce output substantially. Shade, dirt, damaged panel, poor connector, high resistance, or incorrect maximum power point tracking Inspect each panel and connector. Compare string voltages and currents to identify an underperforming section.
Polarity No charging, error code, or blown fuse after installation Use a DC voltmeter to verify positive and negative polarity at both the PV and battery inputs. Positive and negative readings must match the terminal markings and wiring diagram. Reversed PV polarity or reversed battery polarity Disconnect the system and correct the polarity. Check fuses and controller protection circuitry before reconnecting.
Fuses and breakers Intermittent charging or complete loss of input or output With power isolated, check fuse continuity. With the system operating, measure voltage on both sides of the fuse or breaker. A closed fuse or breaker has continuity and very little voltage drop under normal load. Open fuse, tripped breaker, undersized protection, or a loose fuse holder Find and correct the underlying overload or short circuit before replacing protection devices.
Cable voltage drop The controller reports a different voltage from the battery terminals Measure voltage at the battery and controller at the same time while current is flowing. The difference should be small; a larger difference indicates excessive resistance in the cable, fuse, terminal, or connector. Cable too small or too long, loose lug, corrosion, or overheated connector Clean and tighten connections, shorten the run where possible, or install correctly sized conductors.
Temperature and ventilation Charging decreases after extended operation or stops when the enclosure is hot Check the controller temperature, enclosure airflow, heat sink, and nearby heat sources. The unit should remain within its specified operating temperature. Many controllers reduce output as internal temperature approaches approximately 50–60 °C, but limits vary. Overload, blocked ventilation, direct sun, high ambient temperature, or loose high-current connection Improve airflow, reduce heat exposure, verify current limits, and inspect all high-current terminals for heat damage.
Battery temperature sensor Charging voltage is unusually high, low, or unstable Inspect the sensor cable and compare the displayed temperature with the actual battery temperature. The sensor should be firmly attached and should report a plausible temperature close to the battery temperature. Disconnected sensor, incorrect temperature reading, or unsuitable compensation setting Reconnect or replace the sensor if required. Disable temperature compensation only when appropriate for the battery chemistry and system design.
Charge settings The controller appears active but does not reach the expected charging stage Review battery type, nominal voltage, absorption voltage, float voltage, maximum charge current, and load settings. Settings should match the battery manufacturer’s published charging requirements and the system voltage. Incorrect battery profile, low charge limit, disabled charging, or incompatible lithium battery protection state Restore suitable settings and confirm that the battery management system, if present, permits charging.
Load consumption The battery voltage continues to fall even when solar charging is shown Measure the load current and compare it with the solar charging current at the same time. Battery state improves only when charging current exceeds the combined load and system losses. Loads are consuming more energy than the array produces, especially at night or in poor weather Reduce nonessential loads, check for hidden standby consumption, and compare daily energy generation with daily usage.
Partial shading and panel condition Output is lower than expected during otherwise sunny conditions Inspect the array for shade from trees, buildings, cables, dirt, snow, cracks, or delamination. Panels should receive unobstructed sunlight and have similar electrical behavior within the same string. Shading, contamination, bypass diode failure, cracked panel, or water ingress Remove shading or dirt when safe. Test individual panels or strings if one section performs differently.
Controller reset and firmware Readings are frozen, inconsistent, or the controller repeatedly restarts Record settings and fault codes, then perform the manufacturer-approved reset and reconnect sequence. The controller should start normally, detect the battery, and display stable voltage and current readings. Software lockup, unstable supply voltage, communication fault, or internal power-stage problem Update firmware only when the correct procedure is available. Do not interrupt power during an update.
Hardware failure indicators No charging remains after wiring, voltage, temperature, and settings checks are correct Verify that the battery and PV voltages are within specification, then test with a known-good source only if safe and permitted. A correctly wired controller should detect the battery and produce charging current when sufficient PV power is available. Failed input protection, damaged MOSFETs, failed current sensor, burnt terminals, or internal control-board damage Disconnect the unit and arrange professional inspection or replacement. Do not open energized equipment.
Final performance check The system appears to work but battery state remains poor Log PV voltage, PV current, battery voltage, charging current, temperature, weather, and load current at several times during the day. Performance should follow sunlight conditions and the selected charging stage; short-term zero current can be normal when the battery is full. Undersized array, failing battery, inaccurate monitoring, persistent shading, or an intermittent connection Use a full-day energy comparison and repeat measurements under consistent conditions before replacing the controller.
Important: Voltage limits, charging stages, temperature thresholds, fuse ratings, and wiring requirements vary by system design. Always verify measurements against the controller and battery specifications.

FAQS

Why might an MPPT solar charge controller show no charging current?

Check the solar input during strong daylight. A shaded panel, loose connector, or blown fuse can provide voltage but almost no current. The panel voltage must stay above the controller’s startup level.

How should I test the solar panels?

Measure voltage directly at the controller’s PV terminals. Do not rely only on open-circuit voltage. Compare readings with the array disconnected and connected. If voltage collapses, inspect cables, connectors, and shading.

Can a full battery cause very low charging current?

Yes. A nearly full battery may be in absorption or float mode. The controller may be working quietly. Check battery voltage after removing charging loads for several minutes. One reading can mislead.

What battery problems can prevent charging?

Deep discharge, a failing cell, or a protection circuit may block charging. Cold conditions can also stop some lithium batteries from accepting energy. Lead-acid batteries may show surface voltage without storing power. The battery may be the real problem.

Which controller settings should I inspect?

Confirm the battery type, system voltage, absorption voltage, and float voltage. Incorrect settings can stop charging early or stress the battery. Check temperature compensation too. Small settings matter.

How can I verify the controller’s display?

Measure voltage at the battery terminals with a multimeter. Compare it with the controller’s displayed voltage. A large difference may indicate corrosion, loose terminals, or damaged cables. Displays can lag. I have trusted them too quickly.

Could heat reduce charging performance?

Yes. Poor ventilation and direct afternoon sun can reduce output. Feel the enclosure carefully, avoiding exposed conductors. Clean dust from vents after isolating the system. Heat can quietly shorten electronic life.

When might the controller itself be faulty?

Suspect it when solar voltage remains stable, but battery voltage never rises. Check polarity, fuses, terminals, and wiring before replacing hardware. A failed temperature sensor or switching component may require controlled testing. My first diagnosis may be wrong. Compare readings over time.

Conclusion

If you are asking, “why is my mppt solar charge controller not charging,” begin by understanding that the controller must receive sufficient solar energy and detect a battery within a suitable voltage range. Check whether the panels are producing power under current sunlight conditions, then inspect the battery for low voltage, damage, or an unsuitable state of charge. A weak battery or insufficient solar input can prevent normal charging even when the system appears connected.

Next, examine all cables, terminals, fuses, and polarity for loose connections, corrosion, breaks, or incorrect wiring. Review the controller’s settings to confirm that the battery type, charging limits, and operating mode are appropriate, and observe any charging or fault indicators. If the system still does not charge, check for overheating, blocked ventilation, unusual noises, or error signals. Testing the panel and battery voltages with a suitable meter can help isolate the problem. Persistent faults may indicate internal hardware failure and require professional inspection or replacement.

Charlotte

Charlotte

Charlotte is a seasoned marketing professional with a deep understanding of the company's portfolio and a passion for elevating its presence in the market. With a keen eye for detail and a commitment to excellence, she ensures that our professional blog is regularly updated with insightful articles......